DIY Handheld Radio Power Supply and Type-C 2S Li-ion Charger
I recently designed and built a DC barrel jack power supply for a handheld radio. This allows the radio to be used without the lithium battery when there’s external power available, such as at a fixed location or in a vehicle. I also designed a small Type-C charger for convenient outdoor charging, since the stock charger is just a bulky 220V AC desk charger.
What I Built
Power Supply
Type-C Charger

Building the Power Supply
1. Design Analysis
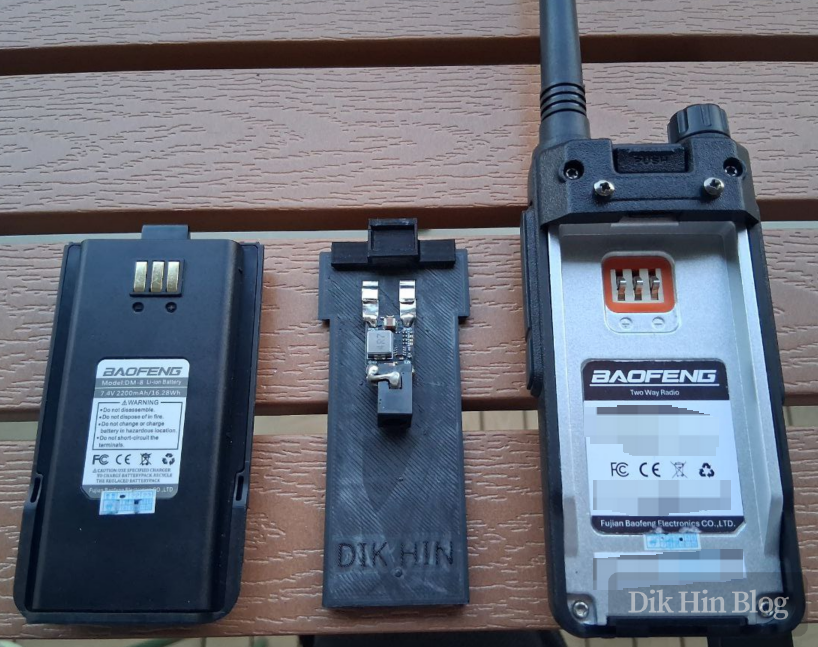
I analyzed the radio’s structure and measured the dimensions. There are three mounting points: two clips at the bottom and a spring-loaded hook at the top.
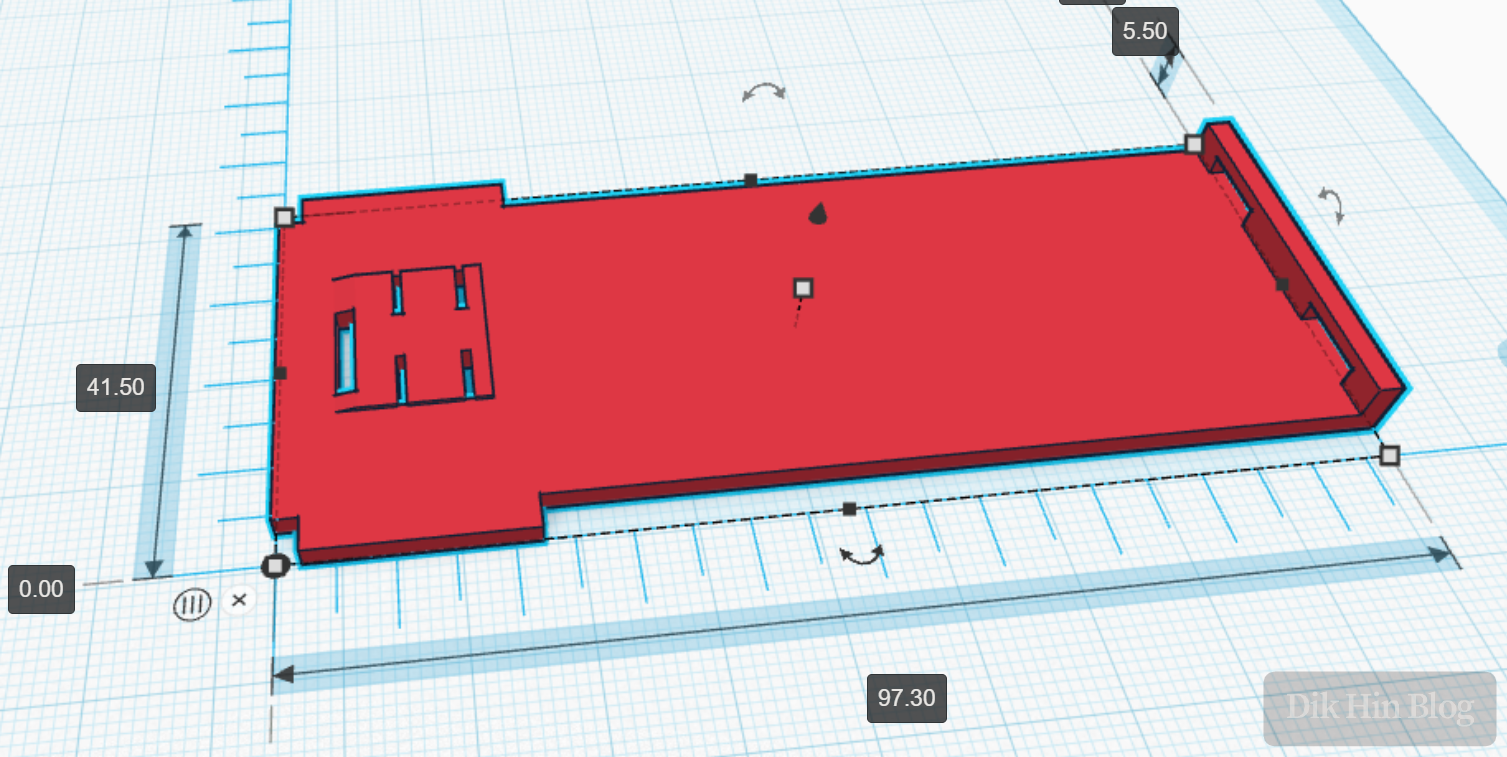
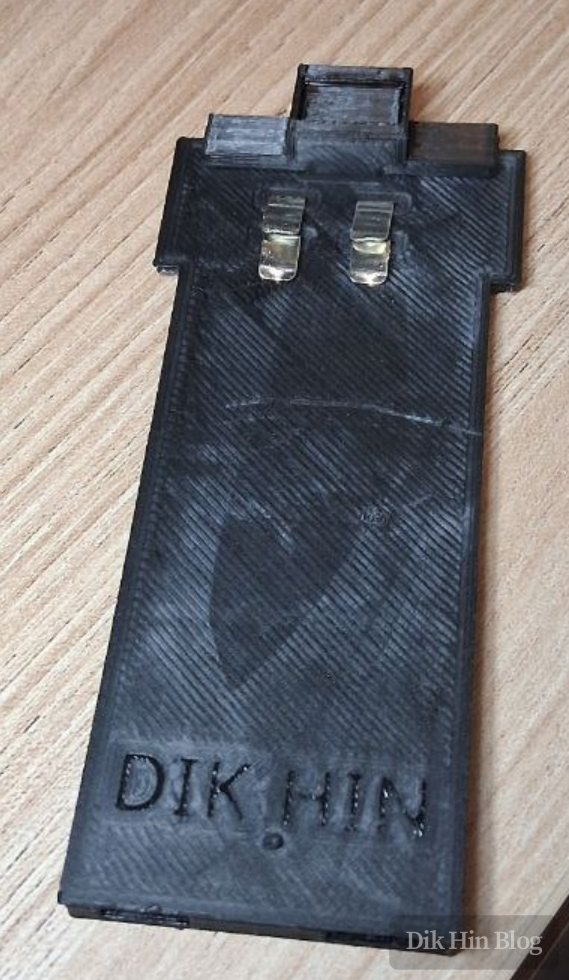
2. 3D Modeling
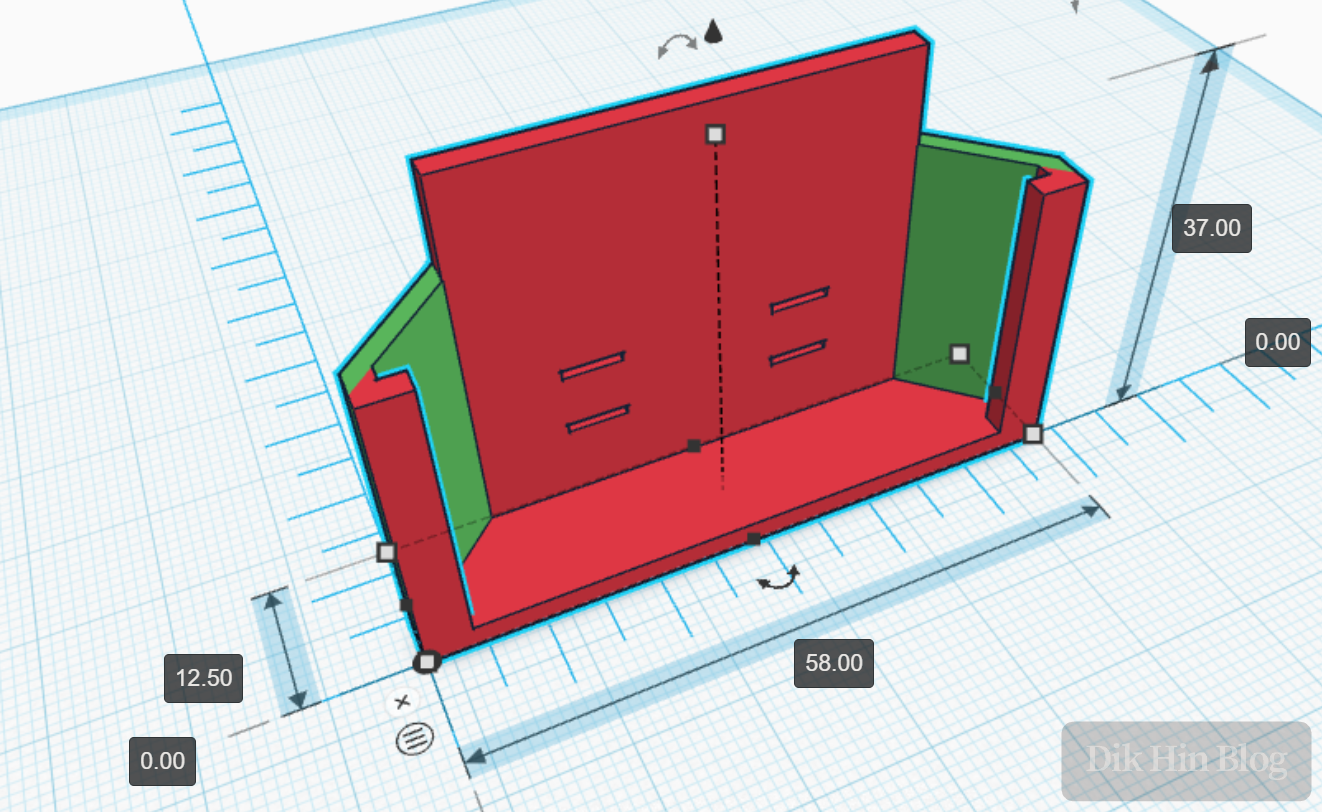
I started designing and 3D modeling. Since my home 3D printer is FDM, which doesn’t handle large overhangs well, I split it into two parts:
- Back plate: Connects to the radio’s power contacts, provides space for the circuit, and clips onto the bottom of the radio
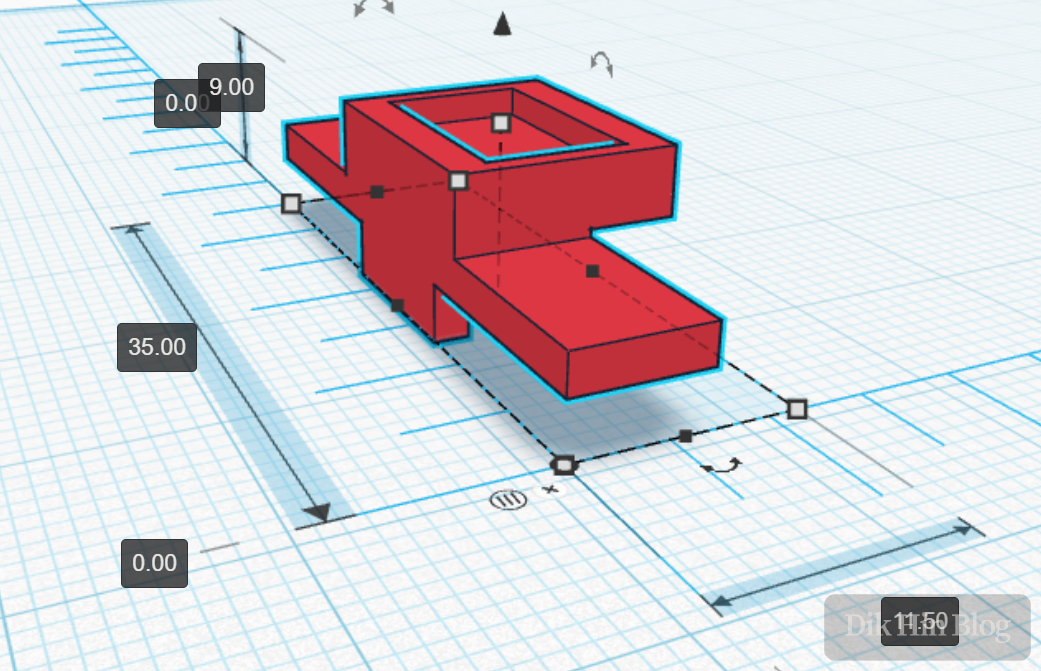
- Clip: Hooks onto the radio’s top latch
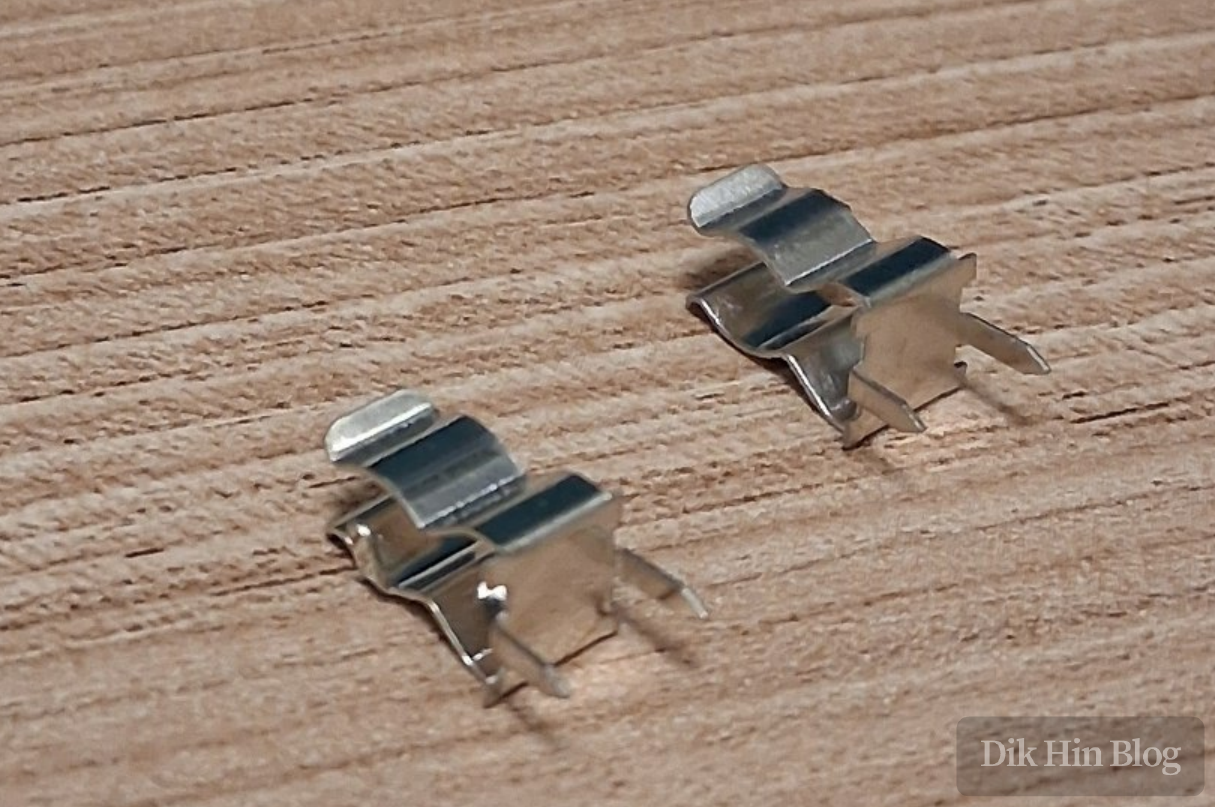
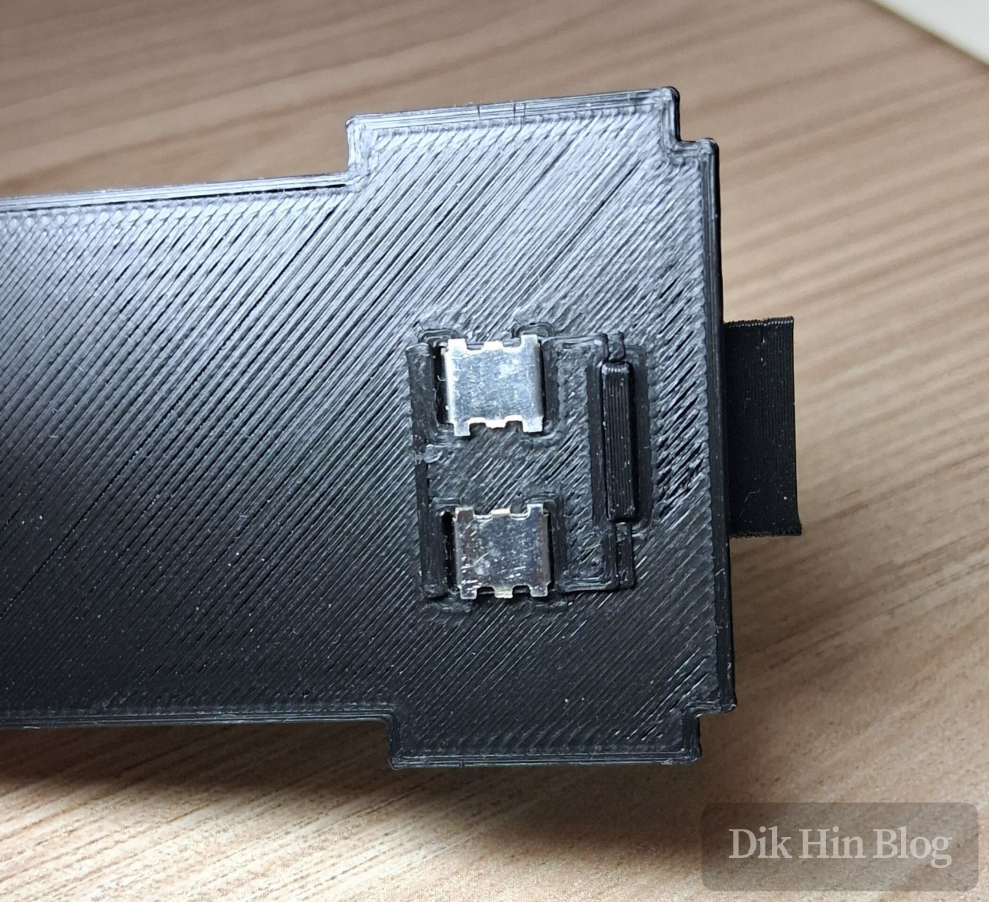
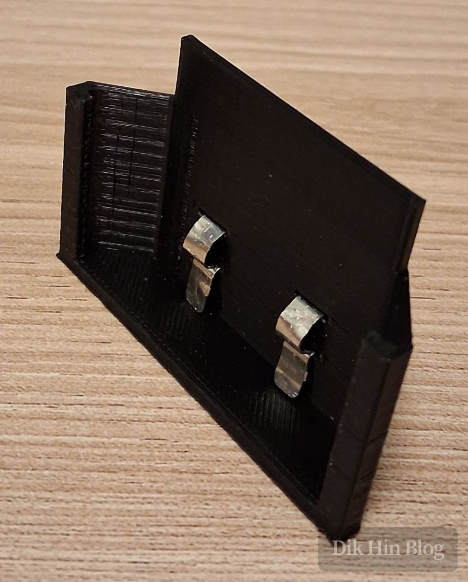
3. Printing and Installing Metal Contacts
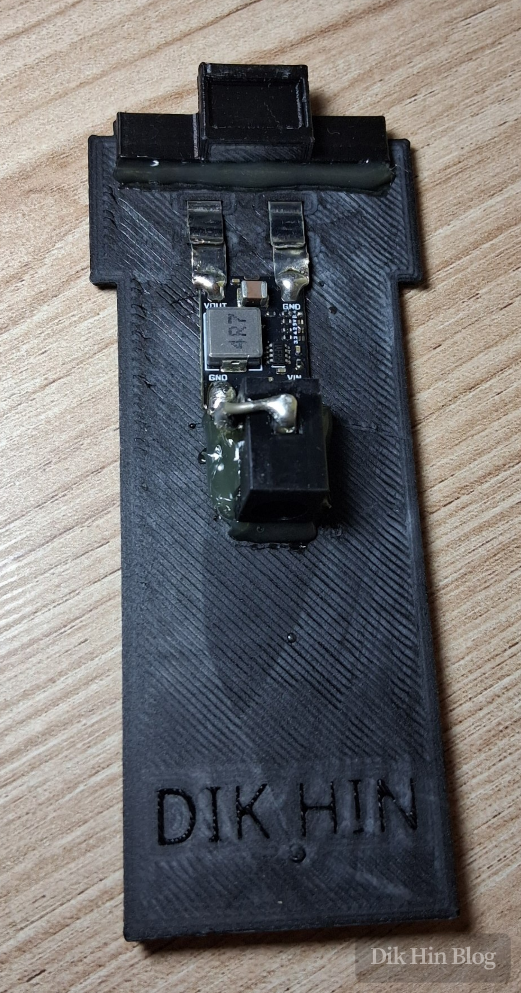
I printed the model and installed the metal contacts for the radio’s power connection. I used a fuse holder bent into the appropriate shape.
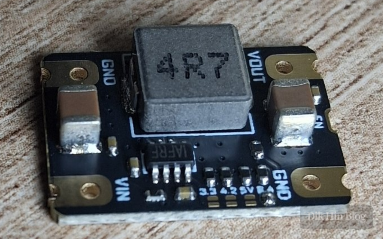
4. Circuit Installation
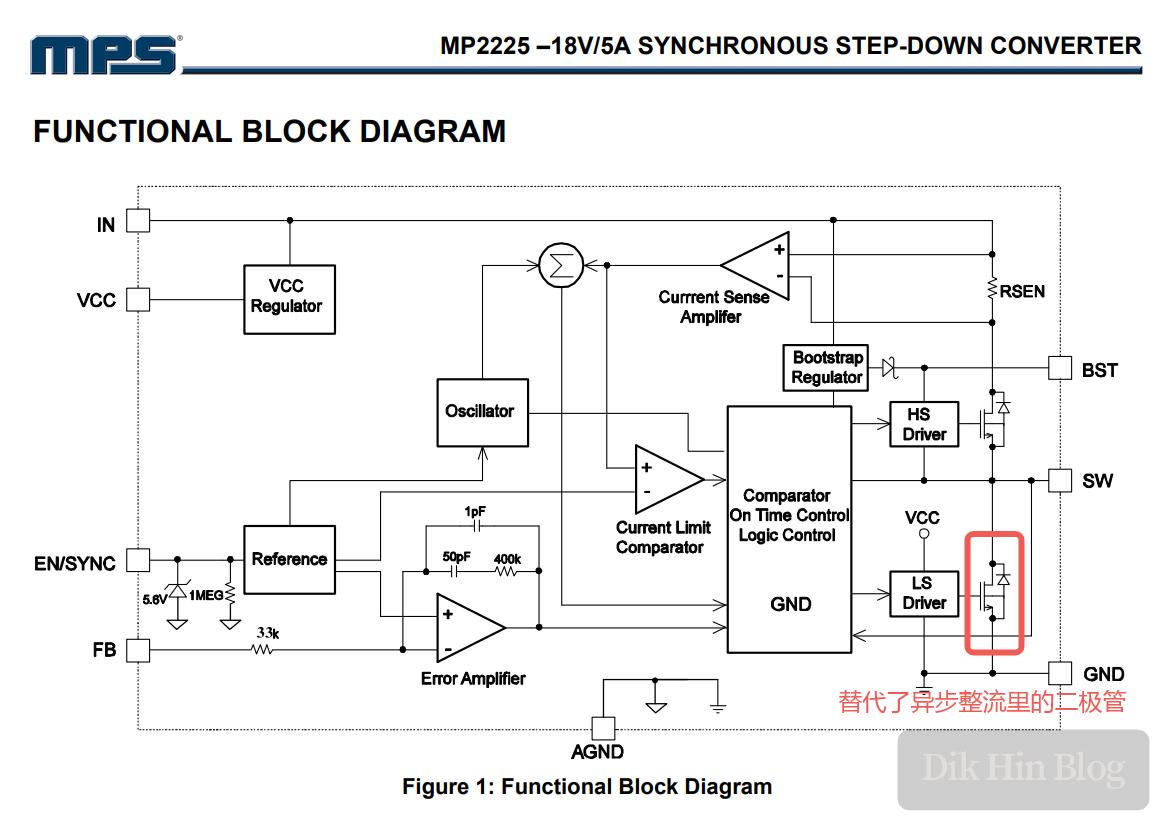
I used an MP2225-based 8.4V buck converter module, chip marking |AFRY, supporting up to 18V input with a fixed 500KHz switching frequency.
The MP2225 uses synchronous rectification (unlike the MP1584 I used in a previous post, which uses asynchronous rectification). It adds an extra MOSFET to actively control inductor current flow, eliminating the Schottky diode required in asynchronous rectification. Schottky diodes typically have around 0.5V forward voltage drop, causing power loss and reduced efficiency, so synchronous rectification is more efficient.
Additionally, the module has 1210 ceramic capacitors on both input and output, which is uncommon for cheap modules - seems like a quality board.
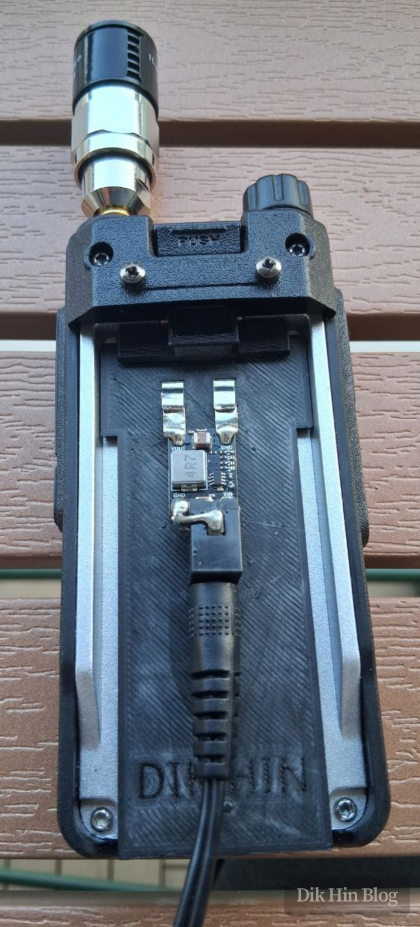
5. Soldering and Assembly
I soldered the radio power connector and DC5.5 barrel jack, then secured everything with hot glue.
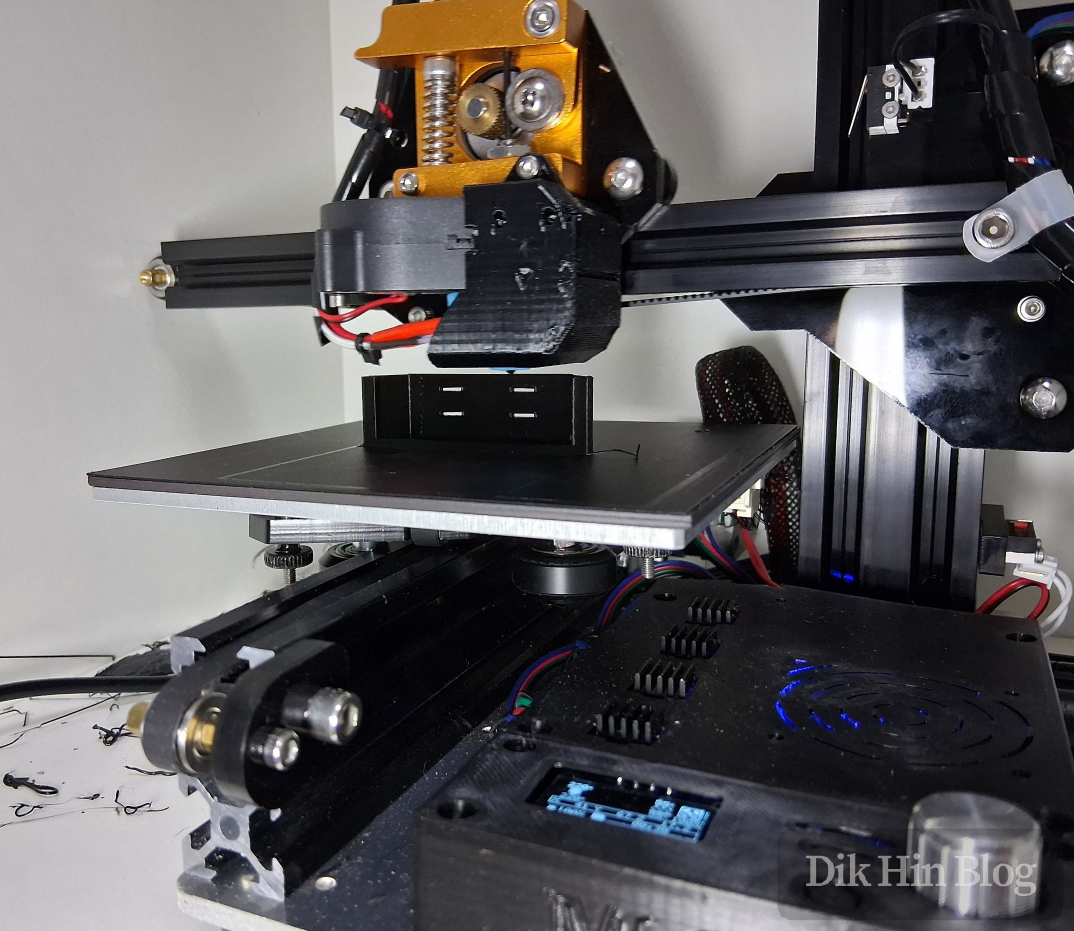
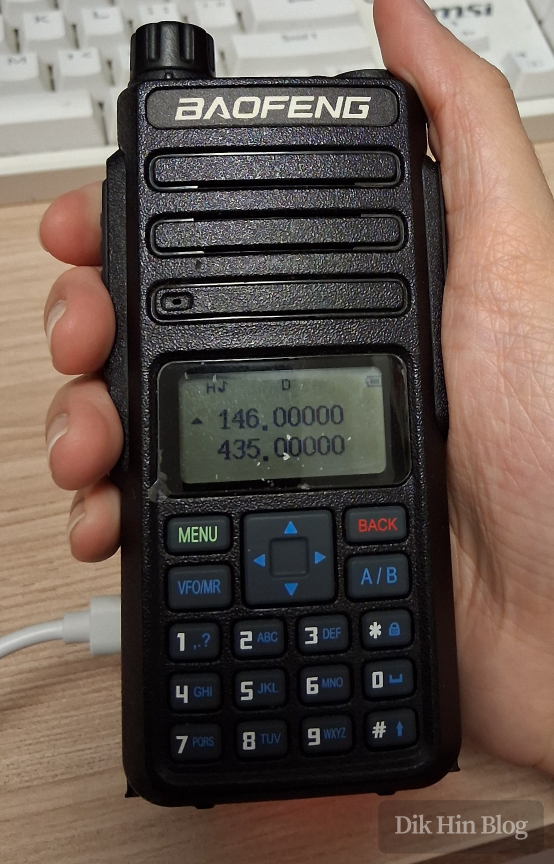
6. Testing
I powered up the radio with a dummy load and tested on 2m and 70cm bands. Both transmitted stably and continuously at nearly 10W - no issues!
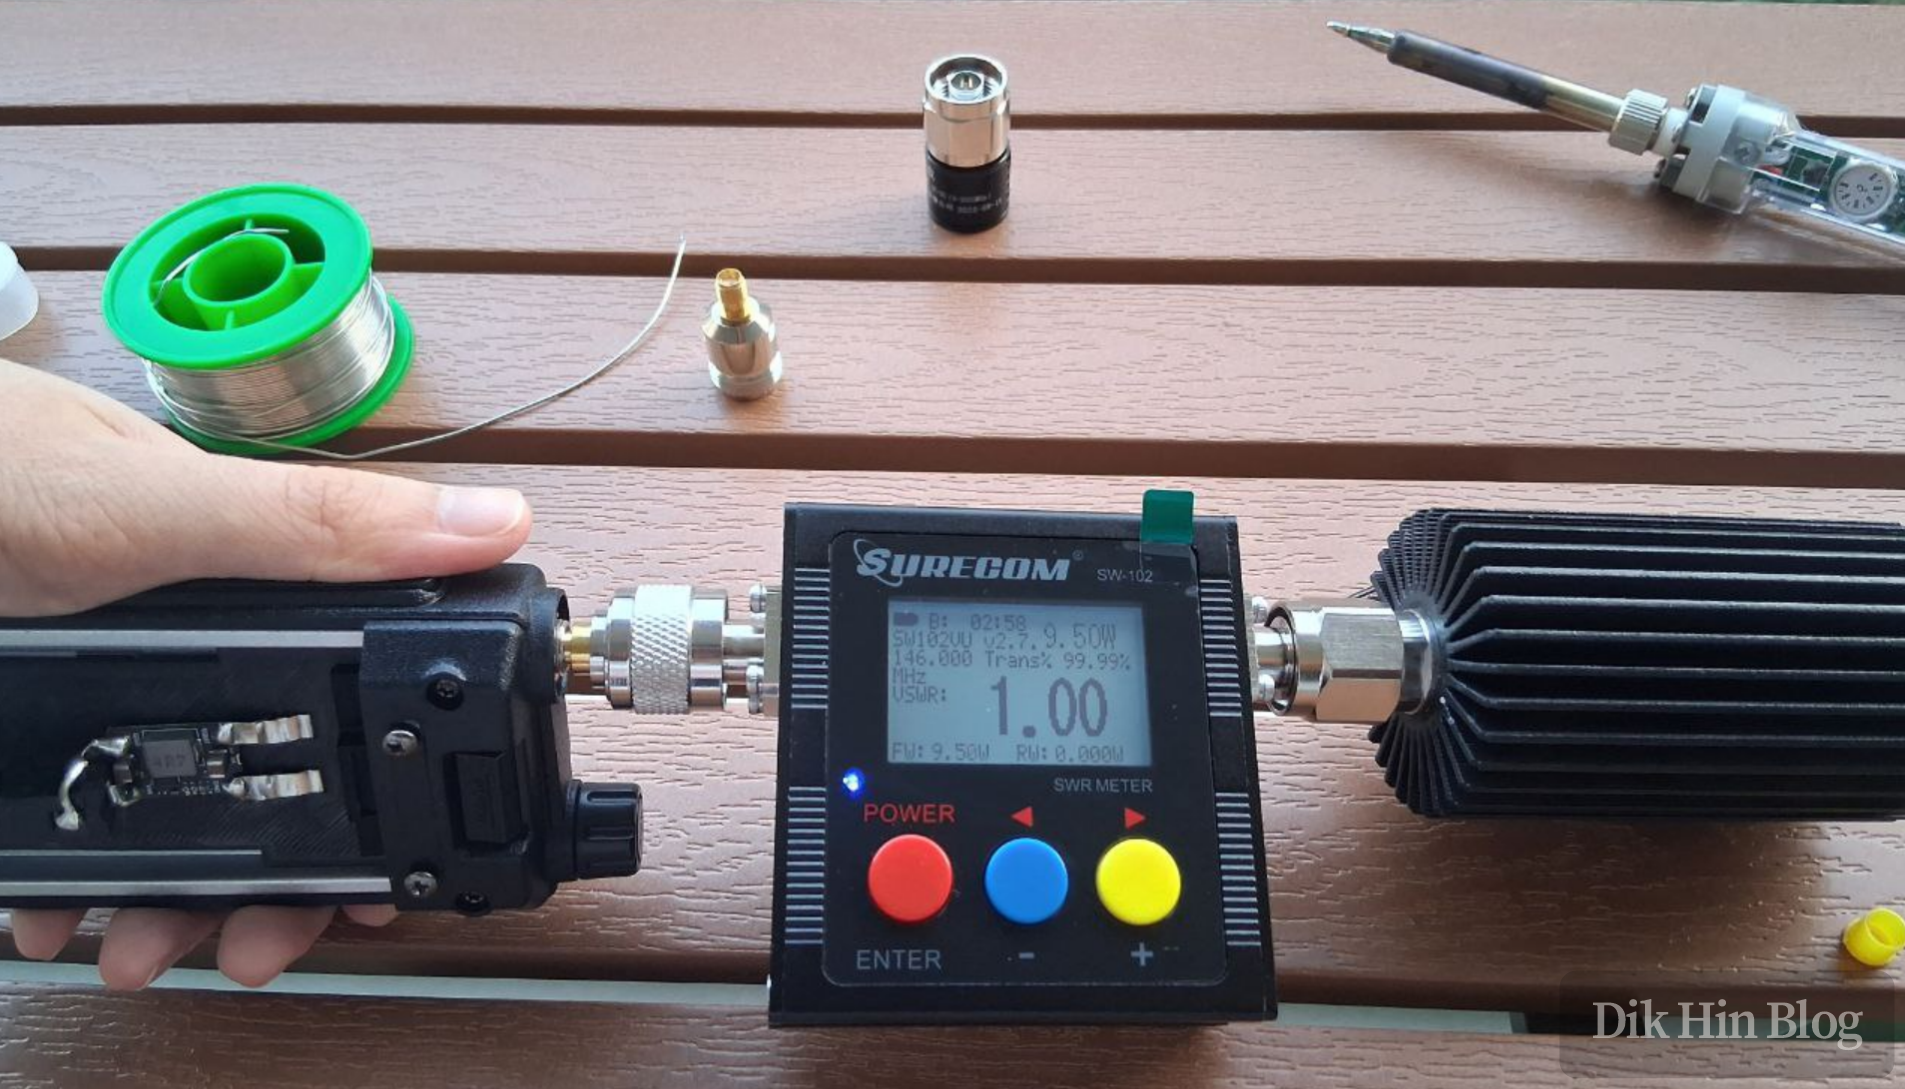

Success! Now when I want to use it as a base station or mobile station, I can power it directly from an external source (10V to 18V) without needing the lithium battery!
Building the Type-C Charger
Sometimes I might take it outdoors as a portable radio, so I still need the lithium battery. The stock 220V desk charger is inconvenient - can’t charge it outside. So I designed a Type-C charger.
1. Design Analysis
I analyzed the battery case shape and structure, measuring the dimensions. There’s a rail slot that can be used to mount the charger.
2. 3D Modeling
I designed and 3D modeled a slide rail that mounts the charger to the outside of the battery, with provisions for the battery electrode contacts.
3. Printing and Installing Metal Contacts
I printed the model and installed it. Again I used a fuse holder bent into shape, forming small spring contacts to press against the battery electrodes.
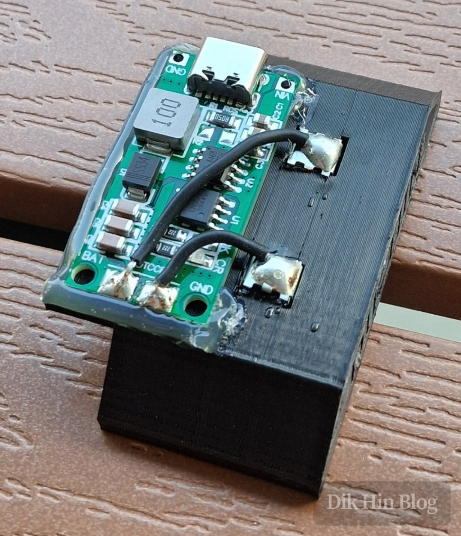
4. Circuit Installation
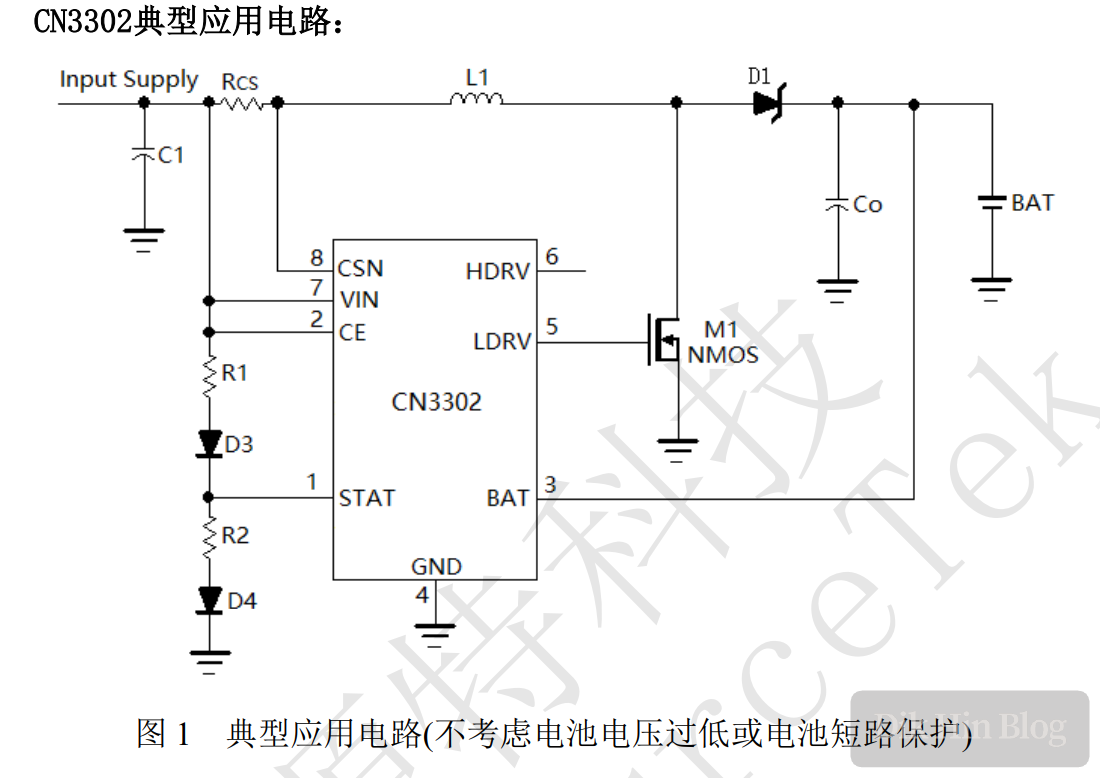
I used a CN3302-based 2S lithium battery charging module. Internally it’s a boost converter with constant current control.
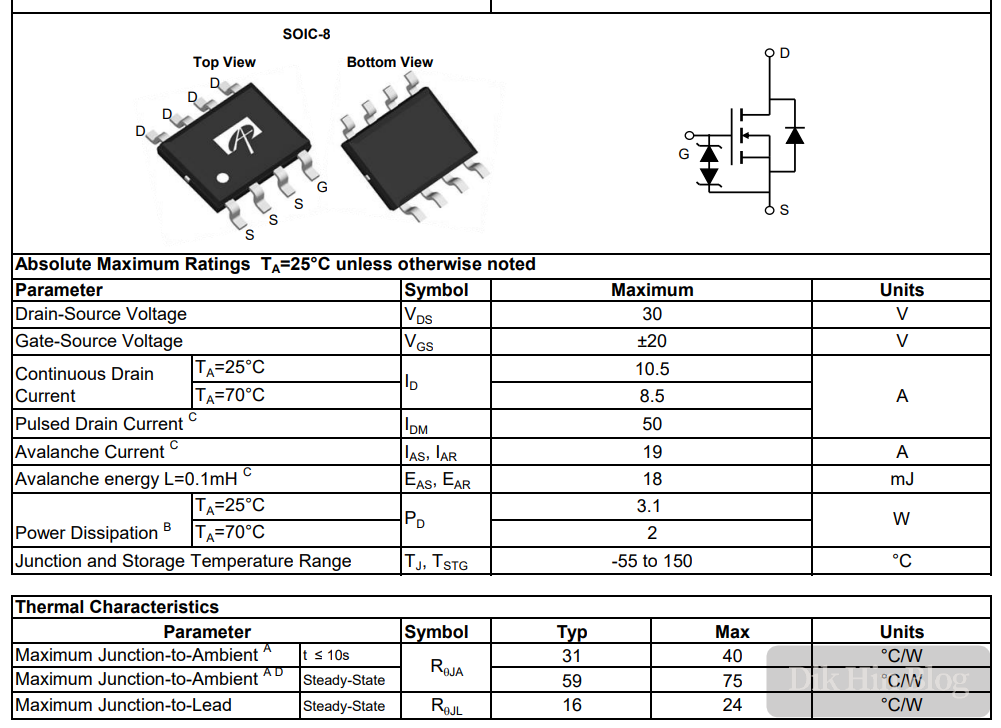
Constant Current Principle: A high-power 0.05Ω resistor at Rcs senses inductor current. The chip turns on the MOSFET when voltage across the resistor drops below 85mV, and turns it off above 125mV. Taking the midpoint: 0.105V/0.05Ω = 2.1A, so input current is regulated at about 2.1A. The chip doesn’t have an internal MOSFET, so there’s a separate AO4468 NMOS next to it, rated for 10.5A max.
Charge Termination: According to the datasheet, when output first reaches 8.4V (full charge for 2S), the MOSFET off-time extends to 5μs to reduce current (called “Quasi-CV mode” in the datasheet, though it’s not true constant voltage, just reduced current). When output reaches 8.4V again, charging stops - charge complete.

5. Soldering and Assembly
I soldered the charging module and secured it with hot glue.
6. Testing
I connected a Type-C cable to test charging. Red LED while charging, blue LED when full or no load - works perfectly!
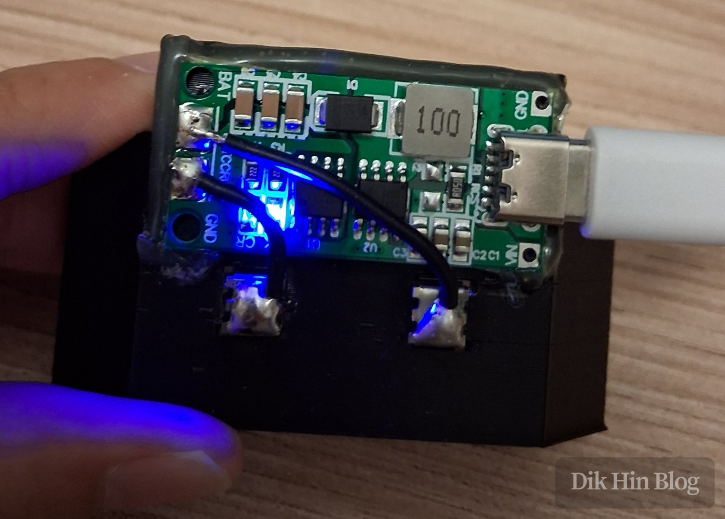
Success!